Understanding solar charge controllers
Temitayo Oketola | August 16, 2022Solar photovoltaic (PV) systems are straightforward technologies. By simply hooking solar panels to a grid-tied inverter, engineers can expect them to rely on the sun’s energy and keep sending power to the utility.
 Figure 1. Solar charge controllers are among the most important components in a solar PV system. Source: Bingjhen/Adobe Stock
However, things become more complex at night when the solar panels aren’t exposed to the sun or when the grid is down. Engineers usually solve this challenge by storing electrical energy using energy storage systems like batteries. However, with energy storage systems connected to solar PV systems, a solar charge controller becomes one of the most important components of the entire system.
What is a solar charge controller?
A solar charge controller is typically installed between the solar panels and the battery bank. And as its name implies, the solar charge controller helps to control and regulate the charge intensity, voltage or current going into the battery bank from the solar panel. For instance, when the battery bank is nearly full, this controller will regulate the charging current to maintain the ideal voltage needed to fully charge the battery. This operation helps prevent the battery from overcharging during the day and ensures power does not run back to the solar panel at night and drain the battery.
In addition, solar charge controllers help prevent the battery banks from over-discharging, especially when the system is overloaded. For example, when a solar system is overloaded and the batteries are quickly running down to zero, the low voltage disconnect (LVD) switching included in charge controllers prevents the batteries from over-discharging. As a result, it prolongs and protects the health of the batteries and ensures optimal solar PV system performance.
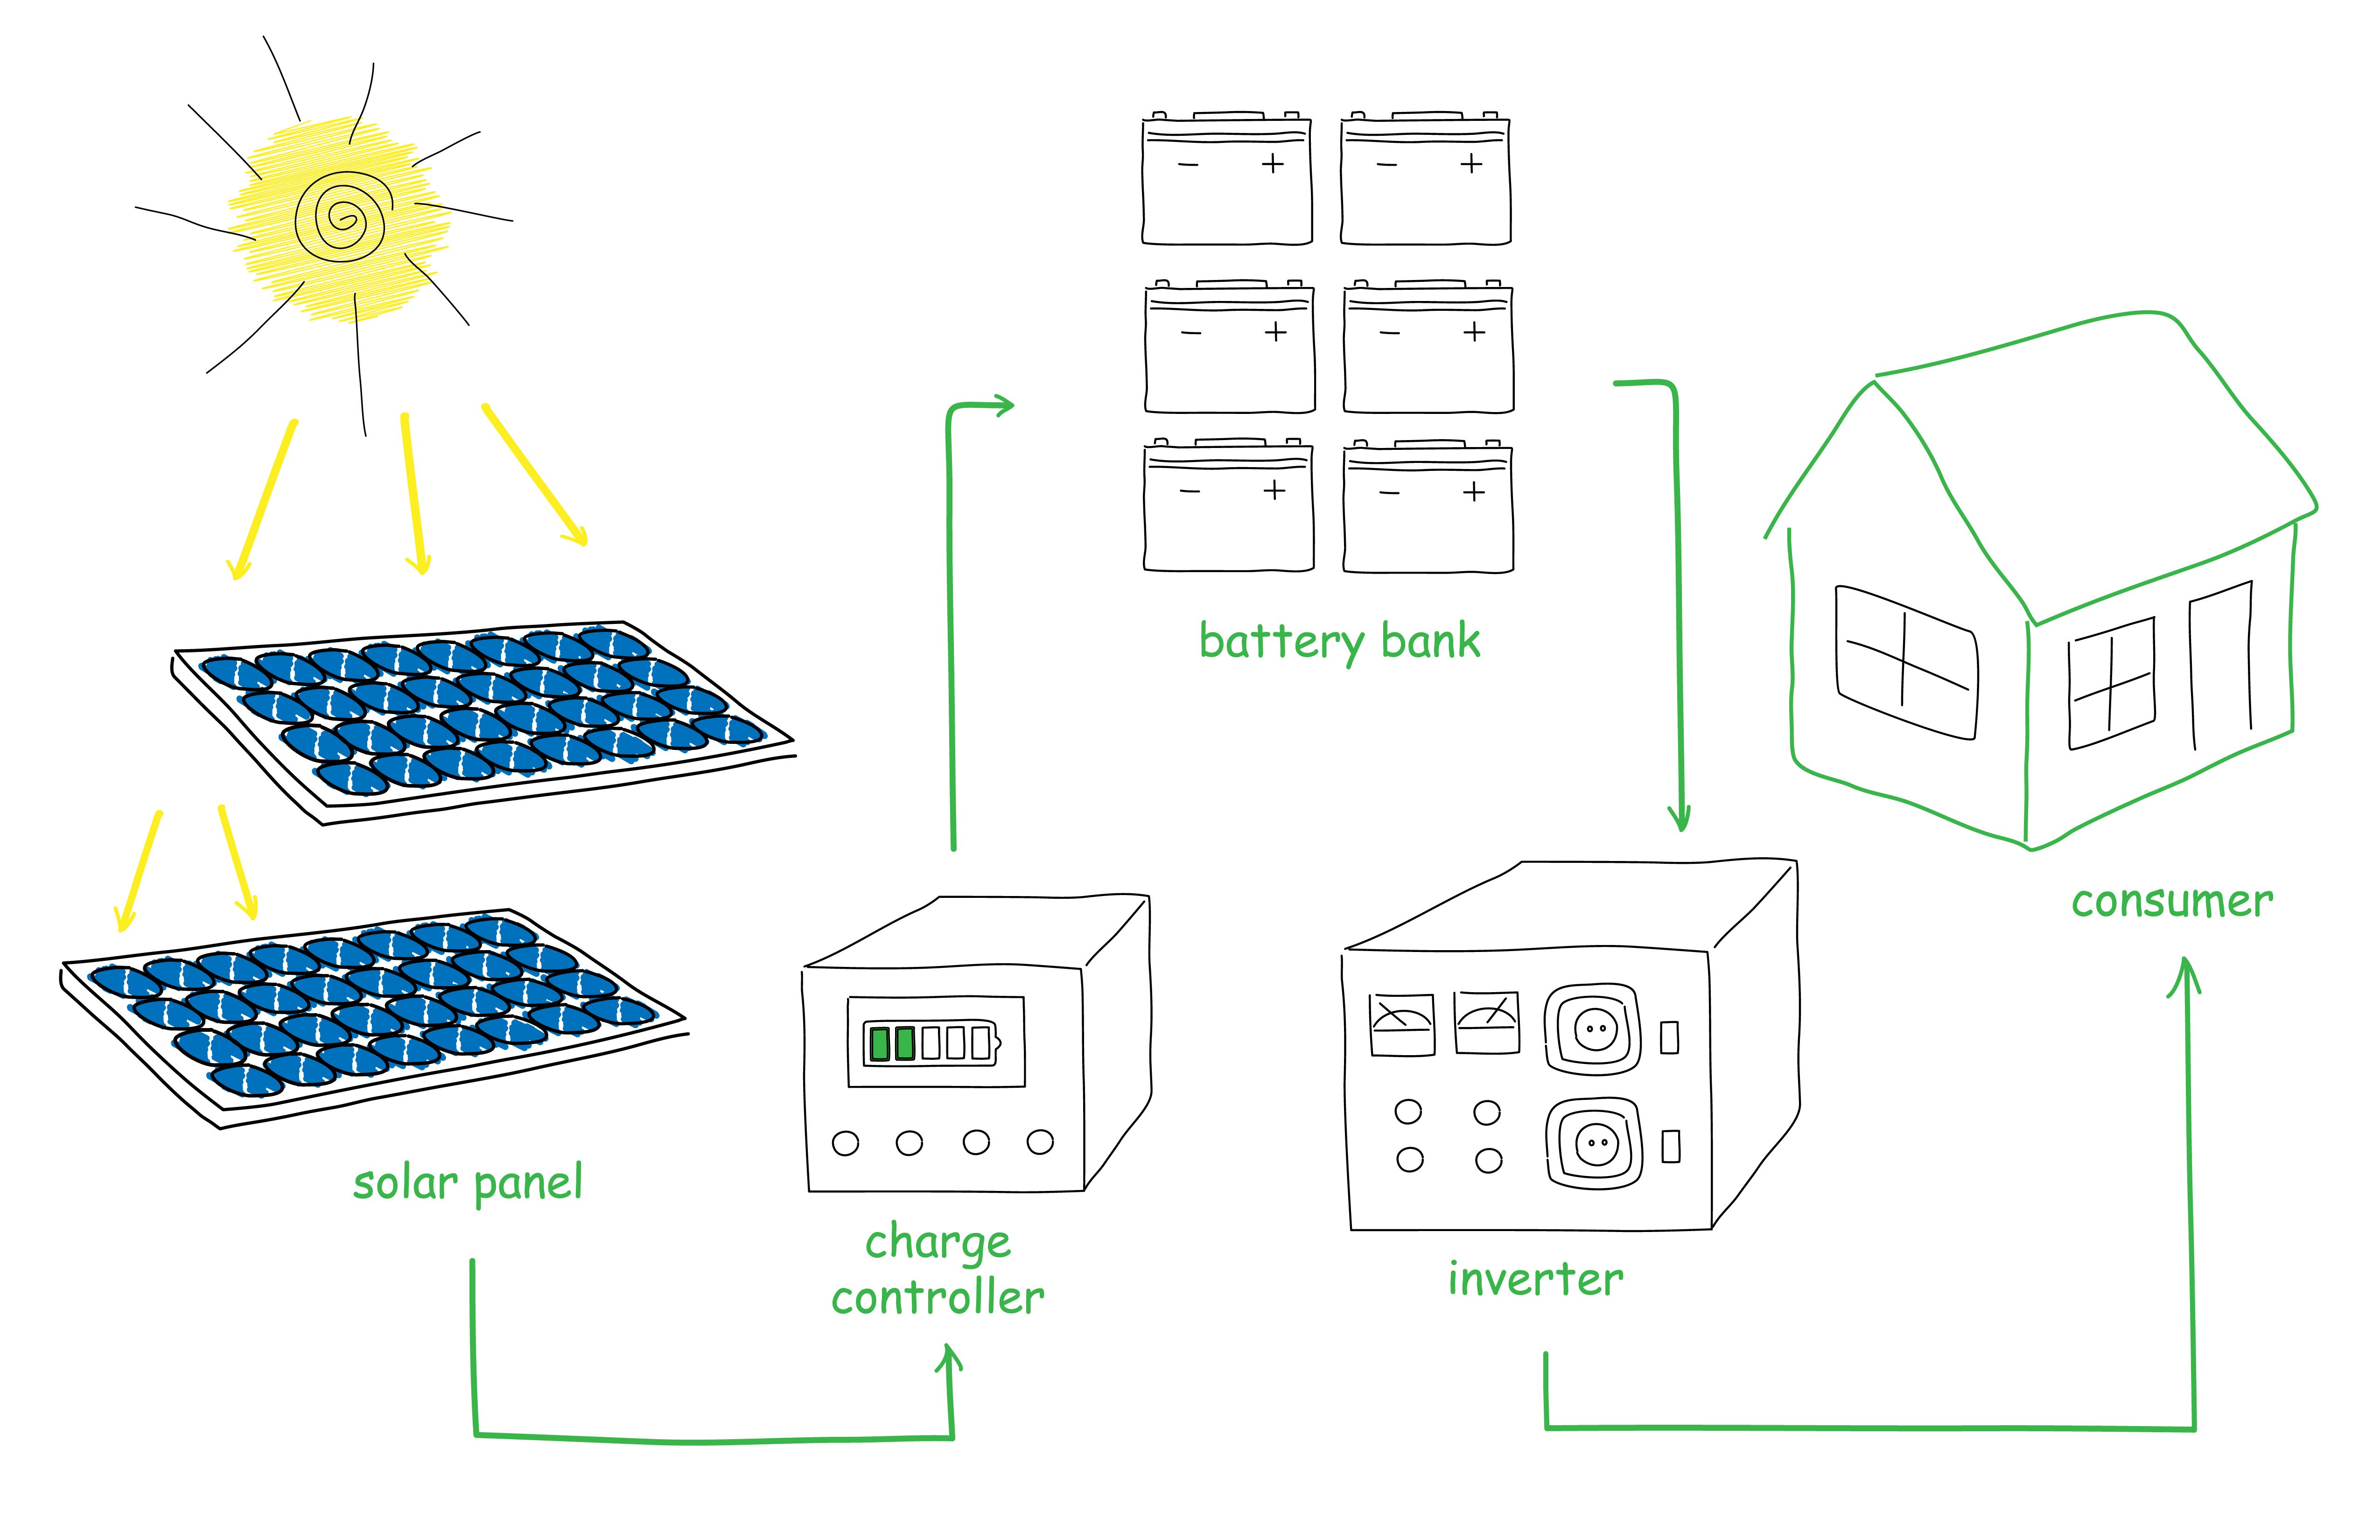 Figure 2. Charge controllers are typically installed between the solar panels and the battery bank. Source: C Design Studio/Adobe Stock
[Learn more about solar charge controllers on GlobalSpec]
Types of solar charge controllers
Solar charge controllers come in three types:
- Simple 1-stage and 2-stage control
- Pulse Width Modulated (PWM) charge controllers
- Maximum Power Point Tracking (MPPT) charge controllers
The simple 1- or 2-stage controllers include relays and shunt resistors that control voltage in one or two steps by shorting the solar panel circuit once a certain voltage level is attained.
A PWM charge controller can be described as an electrical switch between the batteries. By rapidly opening and closing this switch, the electricity coming from the solar panel can be throttled back to taper off the charge current as the batteries become full.
MPPT charge controllers operate by regulating high DC voltage levels from the solar panel and converting it to a lower optimized voltage needed to generate the most power to charge the batteries. These controllers match the solar panel voltage with the battery voltage without sacrificing power. The MPPT controllers are generally more efficient but costlier than the PWM charge controllers. Nevertheless, engineers can achieve an identical level of performance so long as the charge controller system is correctly sized and selected for an application.
Essential tips to select and size solar charge controllers
When sizing charge controllers, engineers must ensure that the controller is large enough to handle the amount of current and power generated by the solar panels. For instance, charge controllers come in different sizes, with voltage ratings ranging between 6 V and 60 V and amperage ratings ranging between 1 A and 60 A. In an application where the solar arrays produce 35 A of current, a PWM charge controller rated at 30 A would likely fail during operation. Likewise, the voltage battery banks must be compatible with the charge controller’s voltage rating.
As a rule, engineers can select PWM controllers through the following steps:
- Check the nominal system voltage to determine the voltage battery banks that the controller is compatible with.
- Compare the charge controller’s amperage rating with the rated battery current and choose a controller with an amperage rating greater than the rated battery current. As a rule, it is recommended that engineers use a factor of safety of at least 1.25 when choosing this charge controller. This will ensure that the controller can withstand higher current during periods when the panel experience more current than its rated current.
So, consider a scenario where the solar panels produce 30 A during operation. In such a scenario, engineers can choose a charge controller with an amperage rating of 37.5 A, as shown below:

Conclusion
While this article presents the basics of solar charge controllers, there are several other things that engineers must consider when sizing these devices. For instance, engineers want to consider the maximum solar input, battery size and wire gauge. Therefore, engineers are advised to reach out to charge controller suppliers to discuss their application needs.


150 volt rated input voltage to MPPT controllers is not unusual.
Many designers will significantly over size the solar panel capacity connected to a charge controller. This is done to gain more power at the low sunlight parts of the day. Many if not all charge controllers will limit the amount of input current to the controller rating, so not a problem during peak sunlight. If you want more recharge time during suboptimal days, simply adding panels is an easy way to do this, without having to rebuild the entire system.