Moving Into 3D Parts Printing
Tony Pallone | August 09, 2017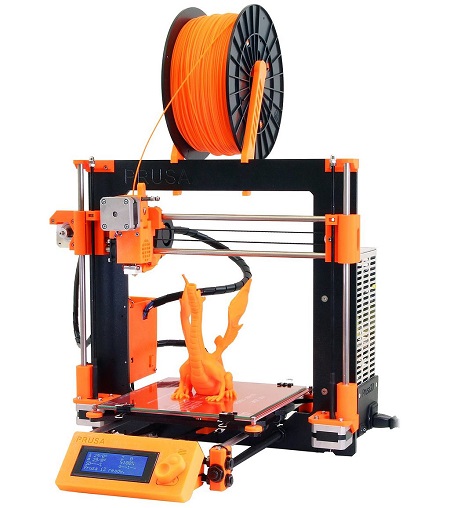 The widely-used Prusa i3 is an open-source FDM printer. Note filament spool at top. Image credit: Josef Prusa/GFDL 1.2.One of the many applications for a 3D printer is its ability to make parts--replacements for parts you’ve broken or lost, component parts to your brilliant new invention, or parts to make “just because you wanted to see if you could do it.”
Sites like Thingiverse and Instructables abound with some pretty inspiring examples--not to mention designs that you can download and try yourself. If you want to join the ranks of the parts-makers, here’s some advice to get you started.
Choose your printer (or service).
Of course, before you can start 3D printing, you’ll need to own your own 3D printer. Or will you? If you’re just looking to get your feet wet, you might first check to see if there’s a local Makerspace that will let you do exactly that--not to mention offer advice and help, since the learning curve for 3D printing mastery can be pretty steep. You can also check your local library.
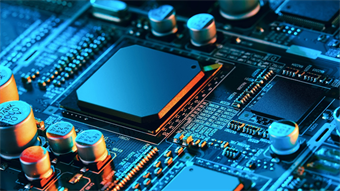
Another option, presuming you’re not yet ready for heavy 3D printer use, is to use a service or network like Shapeways or i.Materialise. A wonderfully useful website for guidance and practical information, All3DP, also a offers a list of top 3d printing services--some of which can fabricate your parts in materials not practical for home-based users. Printing metals, for instance, requires high temperatures, engineering expertise and printer equipment that is generally beyond the price range of an average consumer. Polyether ether ketone (PEEK) plastic is another material that requires high temperatures to fabricate, but may offer significant appeal to the maker community: It can be turned into high-performance parts that are highly resistant to stress, temperature and chemicals, and it can be used as semiconductor components.
If you do decide to go the home-based route, fused deposition modeling (FDM) printers are the most common. These work by heating and extruding thermoplastic filament onto a build table; your part will be built in layers from the bottom up. Support structures are generally used to hold up overhanging parts (parts of the design that angle over 45 degrees); this design principle is also known as the “overhang rule” or “45-degree rule.” Supports are generated automatically by slicing software, and need to be removed after printing to yield a finished product. Removing supports becomes significantly easier if you have a dual- or multi-extrusion printer that can print them in a separate, soluble print material (such as HIPS or PVA, as described below). Standard filament rolls, which are relatively inexpensive and available in a wide variety of colors, can be used on most FDM printers.
Stereolithography (SLA) printers, which represent the original 3D printing technology invented in the early 1980s, are another option for home users. They work by using digital light processing to harden photosensitive liquid resin. SLA printers typically build with a top-to-bottom approach, lifting the part out of a resin bath as it is created. As with FDM printers, support structures are used for overhangs. Post-processing includes a solvent rinse, and in some cases baking in a UV oven.
Because resolution is determined by the optics of a laser or projector, SLA printers can produce objects with significantly more detail and smoother finishes than their FDM counterparts. One drawback to SLA printers, however, is that the resins are proprietary, so you’ll be limited to the supply provided by the printer manufacturer. Colors are also limited, and the end product will be susceptible to sunlight.
While FDM and SLA printers are commonly used by hobbyists, these aren’t the only types of printers available. For more, have a look at the printer guide on 3D Hubs, a comprehensive listing based on over 8,600 reviews form verified 3D printer owners.
Get suited up with software.
There's enough to say about the available software to warrant a separate article of its own -- fortunately, we already have a fairly comprehensive review on our sister site, Electronics360.
Keep it simple.
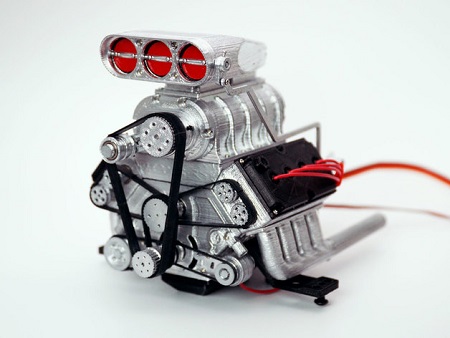 3D-printed, one-eighth scale working V8 engine. Image credit: DarkDragonWing/CC BY 3.0.
The capabilities of consumer-level 3D printers are continually evolving, but it’s unlikely you’ll be able to start printing, say, a working eight-cylinder engine right out of the box. Starting with simple projects to start will help you step into more complex ones down the line.
Note that parts can take several hours to print, so it’s best to start with small pieces in case something goes wrong. Along the same lines, printing one piece at a time is recommended for beginners; if you’re doing several at once and an error causes one of them to get dragged around by the print head, it may affect the entire set. And even when you do get advanced enough to start simultaneously printing multiple parts of a model you’ve designed (“print-in-place” is a common technique for printing assemblies), it’s still a good idea to isolate the trickier parts and print them separately.
Watch those first layers.
The very first layers that are printed will determine the success of the print overall. Warping, for instance, can happen at this stage if the filament does not adhere to the print bed (to prevent warping, try coating the bed with masking tape). If you notice a problem within the first few layers, it’s best to abort to the process--which will save not only time, but also print material.
Choose your materials wisely.
There are a number of materials available for various 3D printing applications; your choice will be guided by factors such as the strength, flexibility and accuracy/precision required. The most common thermoplastic filaments currently in use are ABS and PLA (see list below).
Couple of caveats: Not every printer can handle all of the materials listed below--nor should this be considered a comprehensive list. Some materials not available for SLA printers can be substituted with resins made to simulate the same properties. Many thermoplastic filaments degrade from humidity in the surrounding air, so you’ll need to store them in vacuum bags or containers when not in use. And some produce toxic fumes when heated, so be sure to use proper ventilation.
Here’s an alphabetic sampling of some of the materials available for desktop 3D printer use:
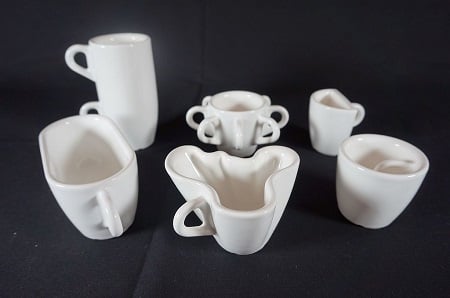 Ceramic 3D printing. Image credit: Sam.Donvil, artwork by Bernat Cuni/CC BY-SA 4.0.Thermoplastic filaments
- ABS. Strong, lightweight and impact-resistant, petroleum-based acrylonitrile butadiene styrene plastic is one of the most popular materials for desktop 3D printing. Because higher temperatures are required, use of a heated printing bed is recommended to prevent warping. Instead of coating the bed with masking tape as suggested above, use heat-resistant Kapton tape. ABS comes in a wide range of colors, and produces prints similar in quality to Lego bricks.
- Conductive. Conductive filaments are usually based on ABS or PLA material. While this material is on the pricier side, it can be used to print low-voltage electrical circuits.
- HIPS. High impact polystyrene is an extremely durable and impact-resistant plastic. Because it’s also soluble, HIPS is often used as a support material in FDM and SLA printing, particularly in conjunction with ABS. A chemical (liquid hydrocarbon) is used to dissolve it off the finished product.
- Metal/Plastic. If you really want to create something affordably with the look of metal, a thermoplastic filament mixed with low amounts of metal may be your best bet. Note that post-processing may be necessary to get the desired appearance.
- Nylon. Nylon is a generic designation for a family of synthetic polymers; nylon filament is often referred to simply as “white plastic.” Designed for use in FDM printers, it offers strong layer bonding that gives finished prints tensile and mechanical strength – while still being flexible, light and resistant to wear.
- PET. Polyethylene terephthalate is the material from which water bottles are made. It's as strong and flexible as ABS, but does not emit toxic fumes when melted, and will not warp or shrink. It is more difficult to work with, however, and for best results will require fine-tuning of the print nozzle and print bed temperatures. A variant of PET is PETG, which adds glycol to the material; PETG can be printed faster and at lower temperatures than PET, and is also weather-resistant. Both filaments are designed for use only in FDM printers, and prints made from either filament are food-safe.
- PLA. Polylactide plastic is a biodegradable filament, made from organic materials such as corn starch and sugarcane. Available in a variety of colors, it can be used in both FDM and SLA print environments. It has a unique sheen and smooth appearance, and, alongside ABS, is one of the most popular materials used for desktop 3D printing. Because it has a much lower melting point than ABS, it does not require a heated printing bed; it is, however, more susceptible to heat and less durable. (Note that this is a particular consideration for moving parts.) Like PET, it lacks toxic fumes -- it actually emits a pleasant fragrance when heated--and is suitable for use in parts that will have contact with food.
- PVA. Polyvinyl alcohol is a biodegradable plastic that, like HIPS, can be used as a support material. It has been engineered to be soluble in tap water; no special chemicals are required to dissolve it. PVA is designed for use only in FDM printers. It is best used as a support for PLA because of its similar extrusion temperatures.
- Wood. Wait, you can print in wood? Well, sort of. This filament is actually another thermoplastic with added wood fibers, but it offers more than just the appearance of the real thing: parts made with your FDM printer from the material can be cut, sanded or painted. Unlike the real thing, however, it’s fragile and inflexible--you probably wouldn’t want to try printing functional furniture with it.
Other materials
- Ceramics. Clay made with fine-grained particles and water for added plasticity can be used in both FDM and SLA printers to produce hard-wearing, heat-resistant ceramics. After printing, the part is turned into solid pottery in a kiln.
- Sandstone. Full-color parts can be created in one process with sandstone, also known as gypsum, on an FDM printer. The end result will create a fragile product, making the material most suitable for conceptual models and prototypes.
- Wax. High-resolution wax prints can be made on an SLA printer. Wax is usually utilized as a stage in the production process (such as in the casting of metal components) rather than an end-stage product.
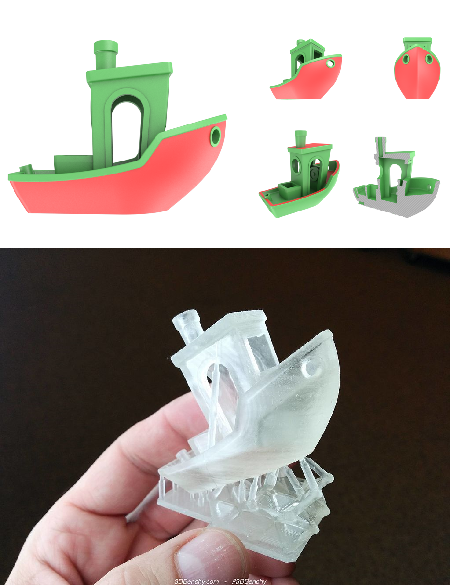 #3DBenchy, multiple views (top); printed in resin (bottom). Image credits: Creative-Tools.com/CC BY-ND 4.0; Creative Tools/CC BY 2.0Design considerations.
Designing parts for 3D printing is an art that will most likely involve a ton of trial and error, notes-comparing with others in the maker community, and sometimes just plain old luck to get it exactly right. Of course, the considerations that will be most useful to you also will depend largely on what you’re printing. There are, however, a few bits of advice that are more or less universal to the process:
- Size matters. Most hobbyist printers generally have a small print surface. If you intend to print large parts, you may need to split them up into multiple smaller parts before adhering them together in post-processing. Size also comes into play when considering feature detail and wall thickness for your model. One rule of thumb: Take the printer’s nozzle diameter (also known as thread width) and double it to find the smallest feature you can print. For example, 1 mm is the minimum thickness you should expect a printer with a 0.5 mm nozzle diameter to successfully print a feature. Walls can be designed as a single thread width thick to maximize flexibility.
- Reduce your supports. Generally speaking, the fewer the support structures your model needs, the better. Designing to reduce or avoid supports altogether minimizes material waste and print time, lowers the probability of printing errors, and creates a smoother surface. Manually designing custom supports will allow you to choose their placement and shape, often creating cleaner connections than your software will automatically create for you. You may also find that a simple rotation of the model before printing can radically reduce, or even eliminate, the need to include printed supports.
- Orient for success. Shifting and rotating to find the best orientation for your model can also help you to maximize resolution and minimize stress. If your model includes holes, printing them in a vertical orientation will avoid the limits of the “overhang rule” discussed above. With FDM printers, vertical holes are especially susceptible to shrinkage, so you may need to build in some additional width to compensate. If you horizontally-printed holes are essential, try designing them with a “water drop” shape instead of a perfect circle--or add a support that’s narrower at the bottom of the hole’s arch, wider at the top.
- Moving parts. Most, if not all, of the advice here will apply to the printing of moving parts, although you should observe the caveat of needing to be extra careful about things like clearance and tolerance. A higher clearance value makes it more likely that your parts will actually fit together, of course--but in the realm of moving parts, it will also produce greater inefficiency. It’s a balance you’ll need to address as you work through your design decisions.
- Above all, test. As you learn to anticipate some of the more challenging aspects to 3D printing, you’ll find that preemptive testing will save a lot of time in the long run. This applies whenever you need to compensate for the limitations of the technology, too--the clearance that you need to make a little wider to avoid fusing (especially important if your model includes moving parts), the infill settings that could stand tweaking for increased strength, and so on.
We've covered a lot of ground, and this should be more than enough information to start you sailing into the world of 3D parts printing. On that note, though, it seems only fitting to close with a look at #3DBenchy, a cute little tugboat model designed to benchmark the capabilities of your 3D printer. With a wide range of challenging geometrical features that will reveal issues with model accuracy, surface finish, warping and the like, the model is also humorously referred to as "The jolly 3D printing torture-test." Start with Benchy, and the rest should be smooth sailing.
Happy printing!