6 tips for at-home 3D printing
Jason Toby | May 15, 2022
3D printing, or additive manufacturing, is a fabrication technology that has become ubiquitous among engineers, makers and designers. 3D printing is commonly used to refer to one of the three main types: filament-based (FDM, or fused-deposition modeling), resin-based (SLA, or stereolithography) and powder-based (SLS, or selective laser sintering). All of these technologies start with a 3D model that is then ‘sliced’ into layers. The instructions to create each layer, otherwise known as GCODE, are then sent to a machine that executes the code and fabricates the part.
However, to get the most from the technology, it’s important to understand that 3D printing isn’t a magical process — it has critical limitations depending on the materials and processes involved.
This article is tailored for the engineer, maker and designer who already understands 3D printing, but is looking for some tips to make their 3D prints more successful and practical for everyday use. This is especially important for at-home 3D printing, where a corporate budget isn't funding production.
Break up large parts into smaller prints
Smaller parts are simply easier to print. They use less material, and therefore take less machine time. Larger parts are more expensive partly because 3D printers aren’t perfect and are prone to failure. The more material required to print the part, the more likely a failure is to happen. Before starting to design anything, it’s helpful to consider this as a starting point.
Size can also be a limitation for the machine itself. Most hobbyist printers have a functional print volume of 8 inches x 8 inches x 8 inches, or 200 mm3. Production printers tend to allow for larger prints, usually up to 12 inches x 12 inches x 12 inches, or 300 mm3. Any larger than that and it would require a large format printer to make the parts, which often are not able to produce fine details as well as smaller machines.
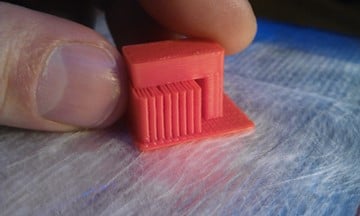 Example of FDM support materials. Source: Creative Tools/CC BY 2.0Avoid support material
3D printing is a layer-by-layer process and fundamentally it will always be fighting against gravity when 3D printing, regardless of the process. This is because each layer builds on the previous layer. Support materials can sometimes be dissolvable, but most of the time they are removed manually and affect the surface finish of the final part, unless they are post-processed with sanding and polishing methods.
Part orientation is important here as well; consider an L-shaped part like shown above. It requires supports under the long section simply because it is printed from the bottom up. If it is flipped 180° over, it no longer requires support material and is therefore easier to make.
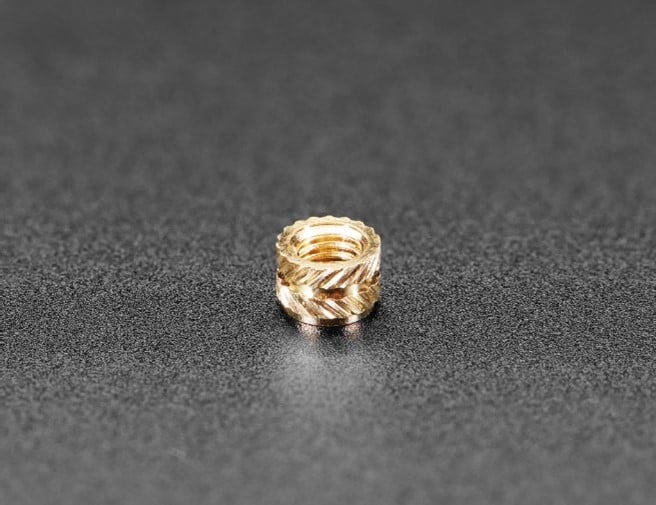 A typically heat-set insert. Source: Adafruit Industries/CC BY NC-SA 2.0
Use heat-set inserts for stronger threads
It’s very common for 3D-printing projects to include screws; this is common across prototyping as well as in consumer products in general. While it is possible to print the screw threads directly onto parts, it should be avoided if possible. 3D printing tends to produce threads that wear quickly and don’t hold much of a load. There are exceptions to this, but generally it holds true.
To get around this problem, try using heat-set inserts to add threads instead. Heat-set inserts are metal components, designed with small grooves that allow plastic to flow into while melting. Typically they are installed via a soldering iron, which applies heat, and then pressed into undersized holes that are printed on the part. For more information, MarkForged has an excellent guide on this.
[Learn more about threaded inserts.]
Choose the best materials
Polylactic acid (PLA) is the most common material used in filament-based printing, and it works really well for most objects and prototypes. However, while it is strong, it is very brittle. It’s also not very resistant to thermal creep or humidity, and will slowly degrade in most outdoor environments.
For anything that needs to hold weight or resist heat, it is important to explore other materials. ABS and PETG are two common materials that are used instead. For even stronger parts, carbon-reinforced nylon can be printed. Some suppliers have developed high-strength materials for resin printing.
Preview the part
Modern computer applications such as PrusaSlicer and Simplify3D make it relatively easy to preview files before running them on a 3D printer. This is a great way to avoid being surprised when printing a file, and an essential design practice for both hobbyists and professionals.
Using a layer view, start with the base layer and work upward to the final layer. Take a look at the details of the part. Does it look the way it is supposed to? Catching mistakes before starting a print can save a lot of headaches, energy and time.
[Learn more about additive manufacturing software.]
Don’t be afraid to outsource
It’s often tempting to print everything in-house once purchasing a 3D printer. However, there are often advantages to outsourcing 3D-printed parts. Within the industry, a company that produces 3D-printed parts for others is called a service bureau. Companies like Hubs, Shapeways and CraftCloud are platforms for uploading a 3D model and purchasing parts from around the world.
As a designer, this opens up materials and production methods beyond what is available in-house. For example, nylon is a material that can be very tricky to print on many FDM printers. Nylon parts can be very durable and even reinforced with carbon-fiber. That said, it is a hydroscopic material that requires dry storage, as well as an upgraded hot end that can print at 250° C. Parts can even be outsourced to be printed in metals, such as stainless steel or aluminum.
Conclusion
Like any fabrication method, 3D printing is not as simple as it seems. New and experienced users may begin to push the boundaries of their printers and discover that their build has failed, or their printer isn't capable. For amateurs and hobbyists investing hundreds or thousands of dollars into this equipment, it is important to be efficient with existing resources, and know when a project is beyond the current means.
Following these tips will be key to preventing some of the most common mistakes and successfully designing parts for 3D Printing.
About the author
Jason Toby is a Boston-based mechanical engineer who specializes in product development for start-ups and inventors. In addition to freelance work, he works full-time at Northeastern University managing a makerspace for engineering students and entrepreneurs.