Maximize fluid life, part 1: Film temperature
March 23, 2023The film temperature is defined as the temperature of the heated surface inside a heater.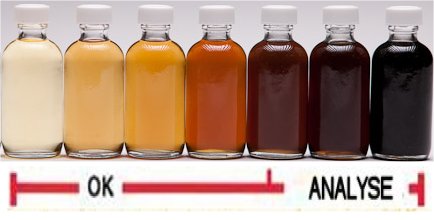 Figure 1: Heat transfer fluid. Source: Paratherm
For fired heaters, the film temperature is measured inside the tube at the wall. For electric immersion heaters, it is measured at the surface of the element.
Because heat flows from high temperature to lower temperature, the film temperature will always be higher than the temperature of the surrounding fluid. If the velocity of the fluid drops below the turbulent flow rate or the heat flux (measured as BTU/hr-ft2 or watts/in2) is too high, the film temperature can be 200° F to 300° F higher than the fluid flowing a short distance away.
If this film temperature exceeds the fluid’s maximum recommended film temperature, the fluid will become “overheated.” This causes thermal cracking, which produces the low boilers that cause pump cavitation, loss of heating capacity and high system pressure.
To prevent overheating, make sure to maintain the right fluid flowrate under all operating conditions. When building an immersion heating system, check with fluid suppliers about their recommended watt density. Finally, if a user has a fired heater, the burner alignment and components should be checked periodically to avoid flame impingement.
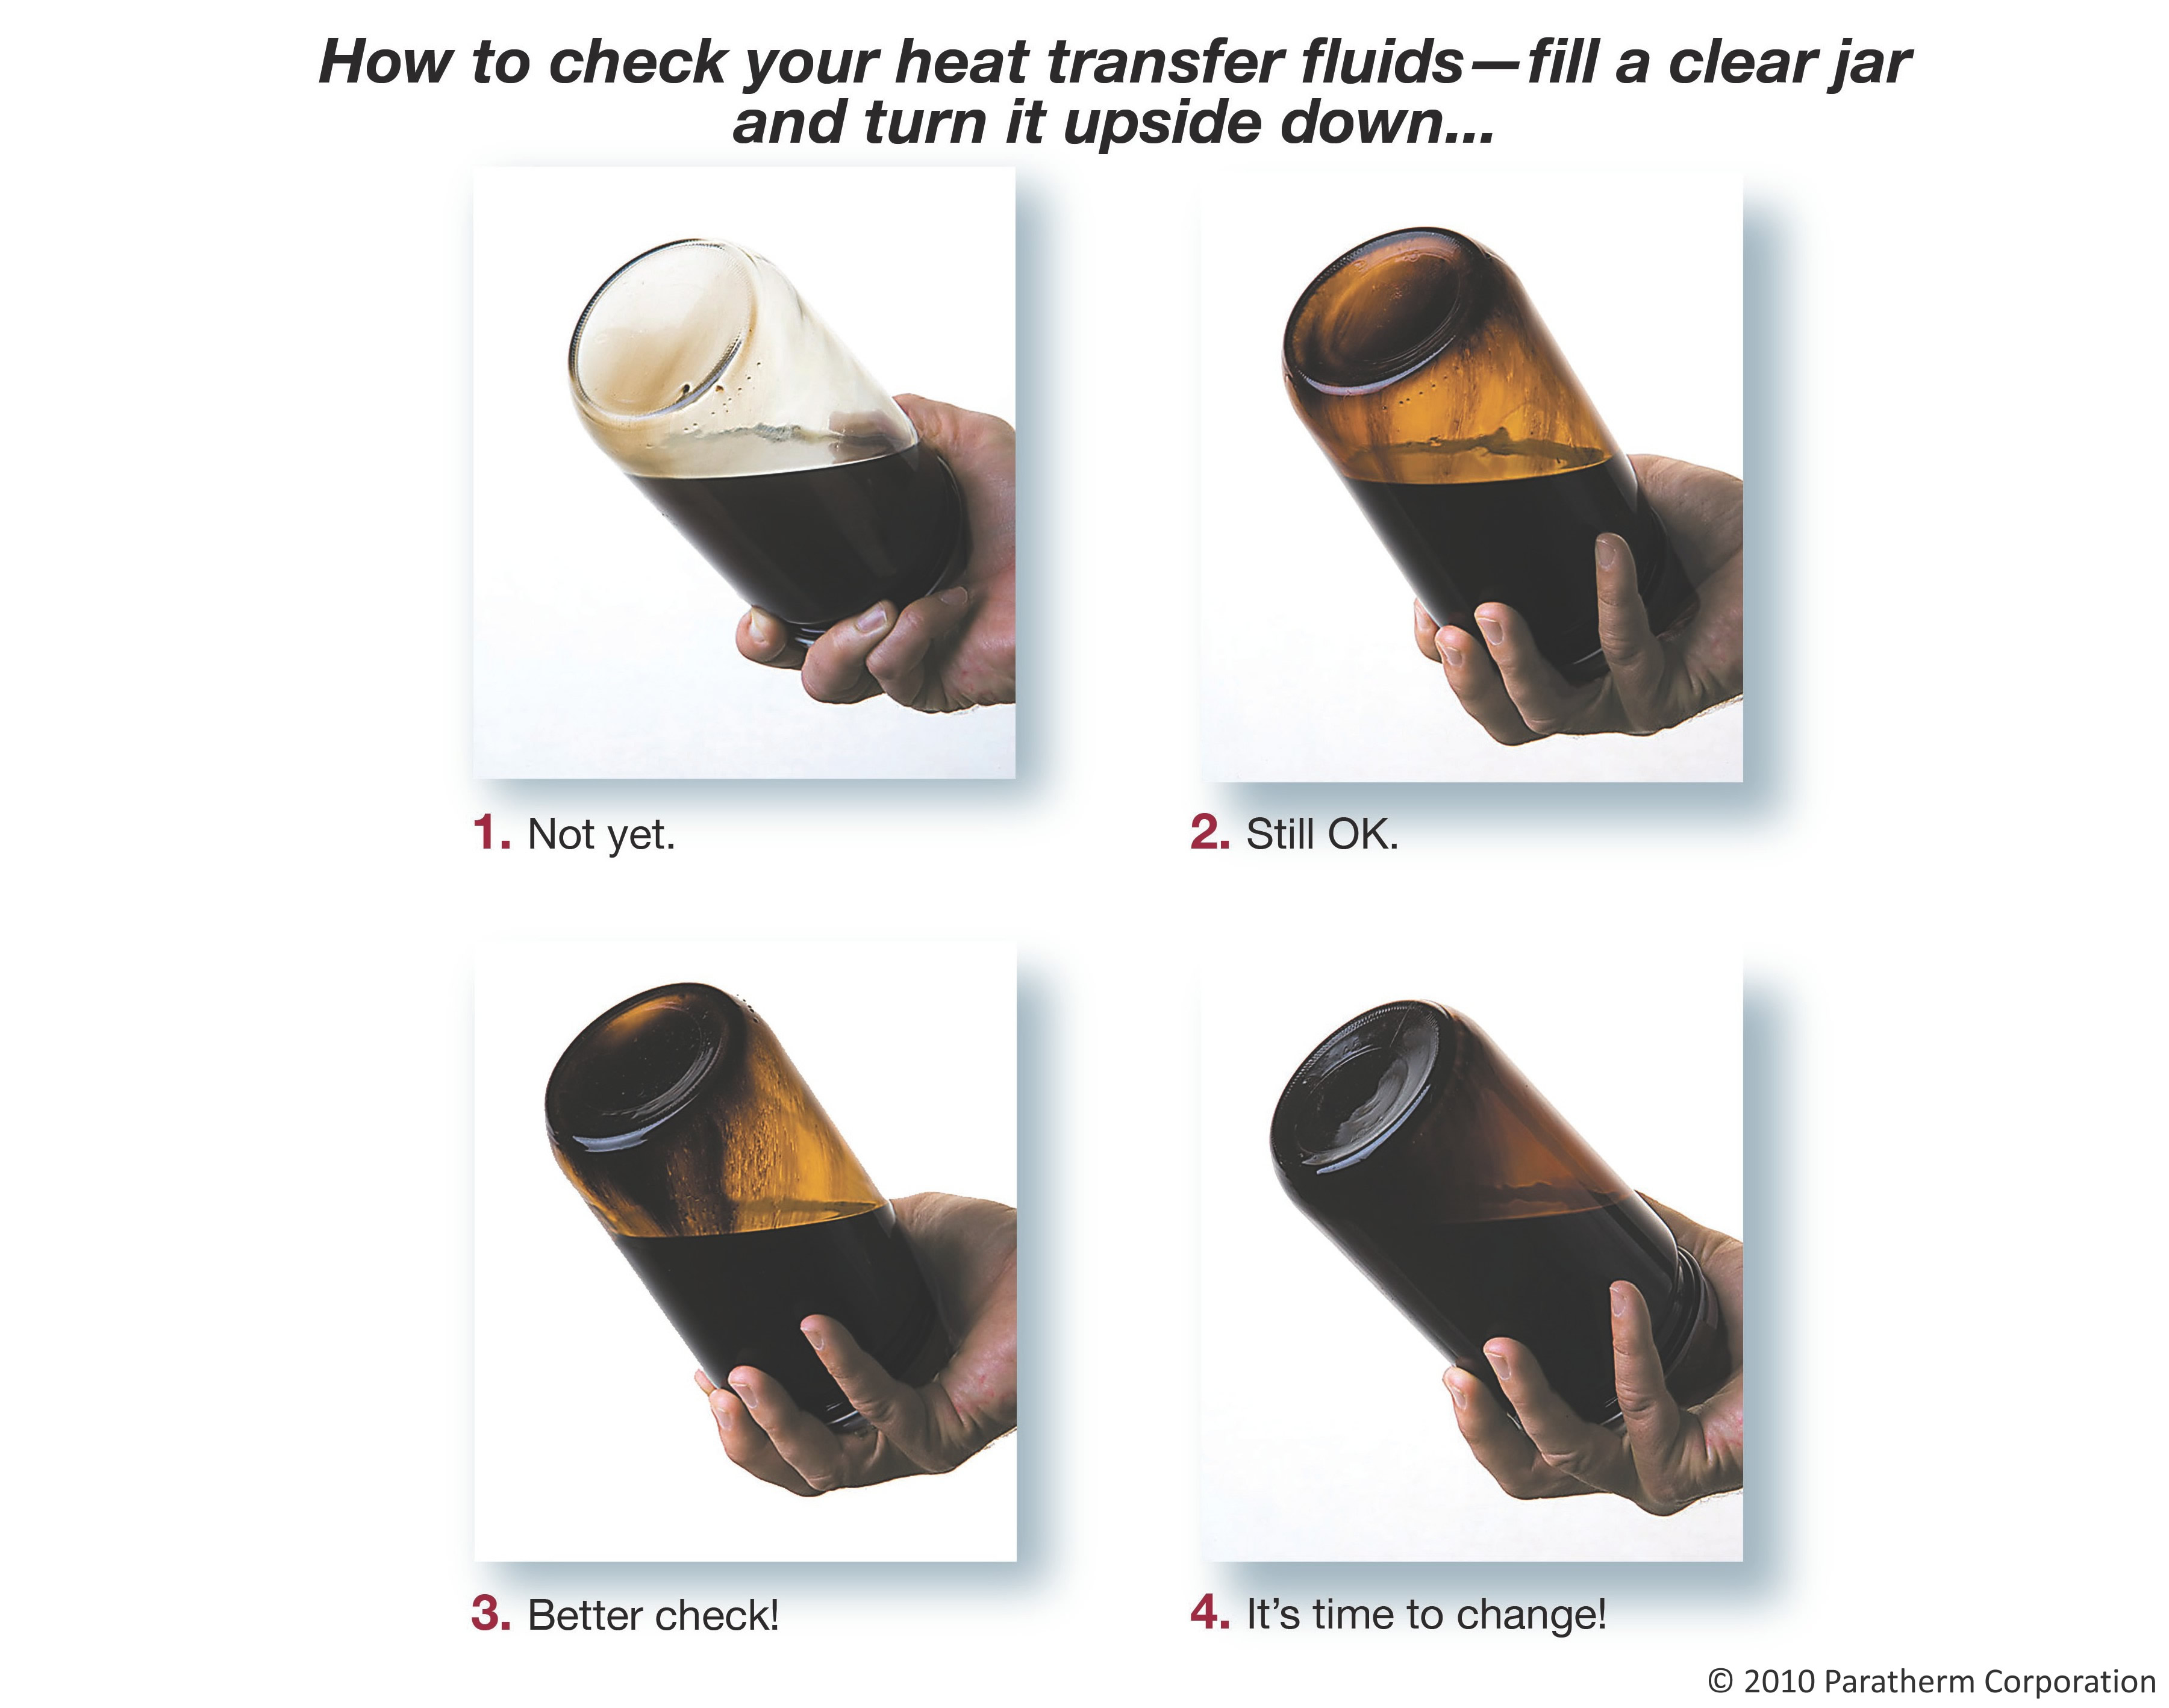 Figure 2: How to check heat transfer fluids. Source: Paratherm
Maximize fluid life, part 2: Oxidation
What is the difference between hot-oil systems that run for years with minimal problems and those that make everybody’s life miserable? Oxidation.
Oxidation is the main cause of heater deposits, plugged lines and that thick black mess that used to be a liquid when users open the drain valve. There is no backtracking — once the acid number (the test used to measure oxidation) reaches 0.4 to 0.5, it is only a matter of time until the problems begin. And there are no cures — the process must be started all over with new oil. And even changing it can become a problem since oxidation increases the viscosity, which in turn increases the amount of effort required to fully drain the system.
The best way to ensure a problem-free system is to make sure that the expansion tank/reservoir temperature doesn’t rise above 140° F during normal operation. Ensure that a warm-up valve has not been left open. Startups will cause the expansion tank temperature to increase for a short time but these relatively short exposures generally won’t hurt anything. If all else fails, put a nitrogen blanket on the tank.
Maximize fluid life, part 3: Contamination
 Figure 3: Heat transfer fluid analysis kit. Source: Paratherm
Contamination of thermal fluid systems is always self-inflicted. It happens when a fluid with poor thermal stability (hydraulic fluid and glycol solutions are prime suspects since they are often stored in drums in the same area) is added by mistake.
An immediate result may be pump cavitation, or a “geyser” from the expansion tank vent. However, many times the only indication that contamination has occurred is a rapid plugging of the pump suction strainer with carbon generated by the contaminant.
Preventing contamination comes down to a simple matter of good housekeeping around the heater:
- Have a hose and pump dedicated to transferring thermal fluids? Padlock them to the heater if necessary to make sure they don’t get used for anything else.
- Promptly remove any empty drums from the room. It might be surprising what gets put into them (and then again maybe not).
- Don’t store other drummed material anywhere close to the heater. This helps to prevent anybody who might be illiterate or color blind from making a mistake.
- Never ever put fluid from the overflow tank back into the system. It’s in the overflow tank for a reason.